Thursday, October 29, 2015

Tracking workout data, using Zapier, MapMyFitness, and Google Sheets

A few months ago, I joined the Zapier team, and embarked on the mission of making computers perform more work (and thus, reduce the monotony inflicted on us humans).


I'm a huge fitness-data geek, and love all of the stats I can get from apps like MapMyFitness. 
When I finish a workout, I manually type in the info/stats from that workout over in my daily journal (currently, Evernote), which is time-consuming, and usually error-prone.


Seems like something that a computer could easily perform - and now that's entirely possible!


Using Zapier.com, it's pretty easy to connect up things so that your workout data from MapMyFitness can be fed into Everenote, Google Sheets, or hundreds of other possibilities.


Here's an example that connects things with Google Sheets, which makes it easy to see your workouts in a spreadsheet view.

If you don't already have an account over at Zapier, you can set one up (for free!). Once you're in, you can set up a Zap, which connects data from one source (like MapMyFitness) to a destination (like Google Sheets - which assumes you already have a Google/Gmail account. If not, it's probably time to give up the AOL.com e-mail address you're using).

Let's set up a Google Sheet (spreadsheet) which will receive the workout data from MapMyFitness.

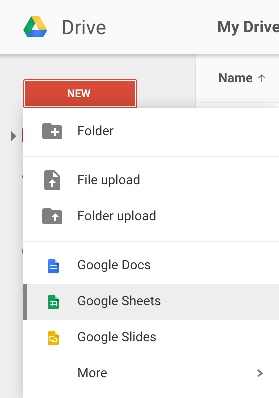
Go to drive.google.com and create a brand new Google Sheet:

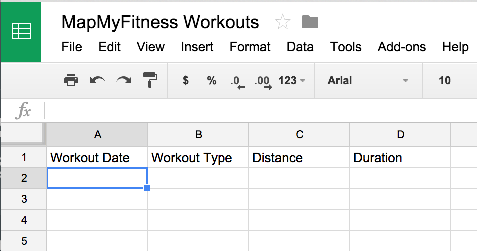
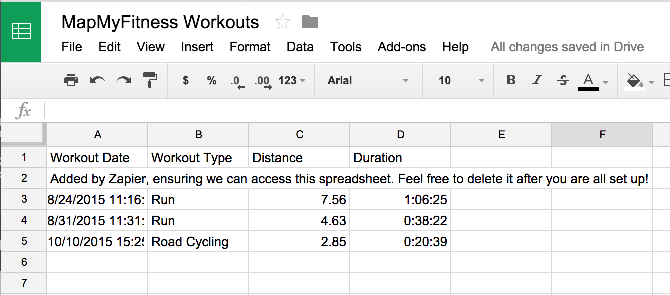
In that sheet, setup some column headings, which indicate the fields/data that you will eventually connect up:


At the Zapier web site, go ahead and create a new Zap!

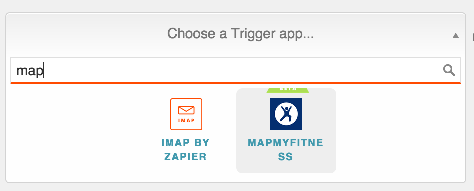
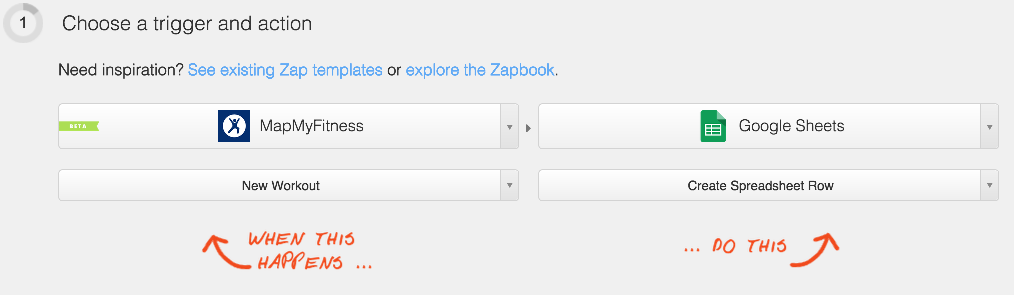
For the Trigger (data source), select MapMyFitness:


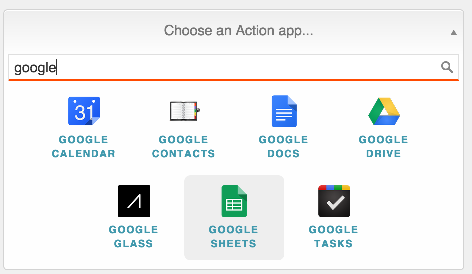
For the Action (data destination), select Google Sheets (again - this assumes that you have a Google/Gmail account, and have setup a spreadsheet like the one described earlier in this article):

Step #1 of your Zap should look something like this:


Zap Step #2: Connect your MapMyFitness account:

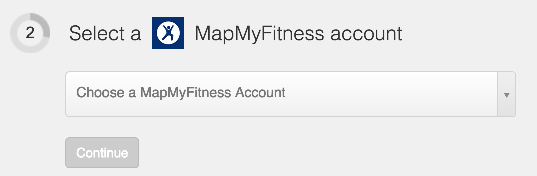
It will redirect you to the web site for MapMyFitness, where you have to grant access for Zapier to read your Workout data. This does not store any passwords - instead, MapMyFitness returns an "access token" that is used to access your workout information.

Zap Step #3: Connect your Google Sheets account. Same thing as the previous step - we don't store any passwords, just an "access token" provided on your behalf.

Zap Step #4: Filtering.
If you'd like to filter out things (like certain types of workouts), you can select the criteria here. Otherwise, just ignore this and continue to the next step.

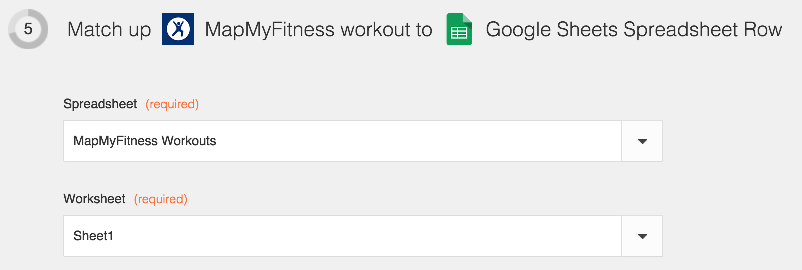
Zap Setup #5: Mapping fields

This is the most important step - this is where you select your Google Spreadsheet, and Worksheet within that spreadsheet (since a spreadsheet may contain many worksheets)


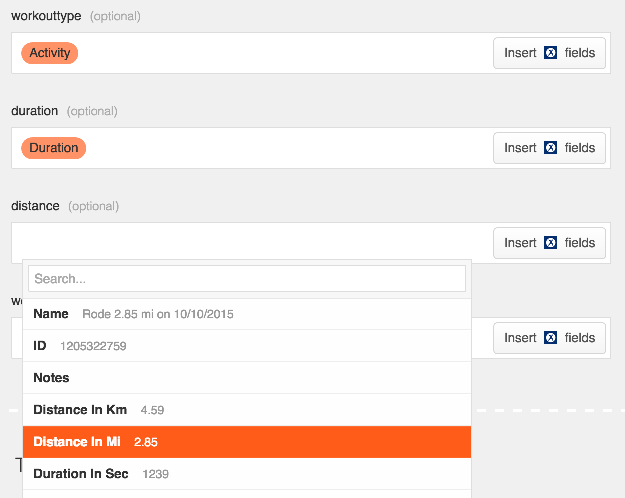
Then, you'll need to select the incoming fields from MapMyFitness, and deposit the data into the correct columns.  For each field, use the button "Insert Fields", and select the correct entry. Like this:


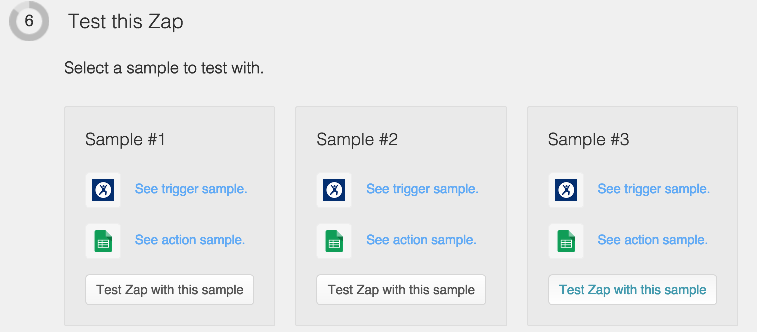
Step #6:  Test it out! Go ahead and "Test Zap with this Sample". This will confirm that Zapier is able to receive Workout data from MapMyFitness. If you already have workout data present, you'll see the three most recent workout entries appear like this:


Step #7: Name the Zap, use something that will help you remember what it's doing, like "Track my workouts"

Go ahead and turn on the Zap, and then go for a walk/run/ride/swim or whatever you do with MapMyFitness. As you complete new workouts, they will accumulate within that spread sheet. Like this:


From there, the possibilities are endless - such as functions to display your total mileage for this year!


Sunday, October 11, 2015

It's a bomb^H^H^H^H clock!

A month ago, there was a huge amount of discussion over a clock that a kid brought to school, which had him arrested and suspended. I have a clock obsession, but only for really weird/geeky clocks. My current favorite is the Tix Clock available at ThinkGeek.

Since I'm usually a month (or more) behind on my blogging, here's my story.

Back in 1998, my dad happened to have a bunch of dual-color LEDs, consisting of Green and Red (and thus, Yellow when both colors were illuminated) that he no longer needed. When I counted them out, there were just over 60 LEDs present - which made me wonder if I could build a clock?

I had spent too much time building all kinds of fun things using various forms of the 8051 microcontroller, and since I had the EEPROM burner and UV eraser in my home lab, it was the best fit for the project.  (These days, I'd much rather use an Arduino or something).

Since a clock would require 60 individually addressable LEDs, along with two individually addressable colors, that equates to a lot more pins than what's available on the 8051.


Multiplexing to the rescue!

I'm a huge fan of multiplexers (and serial shift registers). In this case, I took the 60 LEDs and divided them into four quadrants. I could use two pins to select a quadrant, and then use four pins to select 16 different possible LEDs within that quadrant, using the 74154 4x16 demultiplexor. Throw in the two pins needed for the color selection, and I could drive all of the necessary data signals with eight little bits!

Since I had a few extra data pins available, I hooked up a few push buttons. Two are to set the minutes forward/backward, and two are to set the hours forward/backward. There's a fifth button, but I don't remember what it does.  Maybe some day I'll find the old assembler code I wrote for this project, and see if there's any mention of its purpose.


Assembly

Any true hacker's project rarely comes in a "polished/presentable" case. So the next question was what kind of packaging to use for housing this project? I needed something round, and a large enough size to house a custom circuit board that I made. I thought of a frisbee, but they weren't deep enough for all of the wiring (done by hand - ugh!).  The next best candidate was an ol' fashioned pie tin!  After stuffing everything inside it, I used a piece of wire mesh to hold everything inside it.


Final result

Here's the "internal view".  The 8051 is the big 40-pin beast in the middle (with electrical tape covering the UV-EEPROM window). The push-buttons are just above the CPU. The 74154 is in the top-right corner. There's a bunch of 7407 inverters spread around the perimeter, which are used to drive the LEDs (common cathode/ground), along with a pair of transistors that supply the red/green anodes on the LEDs. Yes, I used to have a lot of spare time back then.


Action shot: The clock displaying the time 3:01:36 o'clock.


Semi-useless video clip:


I'm really thankful I never brought it into school for "show and tell". What's your favorite geeky clock? Leave a comment below!


Monday, July 13, 2015

Grandma's Marathon 2015

   After all of the grueling fun of running Twin Cities Marathon last fall, I decided to do another full marathon (uff-da!) 

  Here in Minnesota, everyone talks about Grandma's Marathon, so it seems to be the "premiere running event" of the upper Midwest. After having completed the run, it's nice and all, but it doesn't compare to the energy and entertainment of the Twin Cities Marathon. 

  Before the race started, the skies opened up and poured rain on top of the runners, as we waited in a car dealership parking lot. Some of the more "dry-minded" folks hit the pavement, and rolled beneath the various SUVs and "higher clearance" vehicles on the lot. Lots of folks (including me) pulled out the disposable trash bag, and threw it on as a temporary poncho.

  The rain lightened up during the first half of the run, and had pretty much stopped by mile 13. Unfortunately, everything was completely soaked inside and out. By mile 15, my right sock formed a soggy wrinkle beneath the knuckle of my big toe, and a blister ensued. I spent the later miles pushing harder with my left leg, in order to take the pressure off my right foot.


  All of that imbalanced running caught up to me around the 22 mile marker (and Lemon Drop hill), when my left quad started cramping up. I spent the last 4.2 miles alternating between a carefully balanced jogging stance, or just walking and massaging the cranky quad muscle, trying to coax a little more effort out of it.

  In the end, I managed to squeeze out a 4:10 finish, and a couple of free beers (whew!)

Wednesday, February 18, 2015

Running the Numbers

Over the last few years, I've participated in a few running events - which makes it difficult to mentally keep track them, and my completion times (fortunately, I have an Evernote Premium subscription to help with all of that). 

Some people consistently run the same event/distance every year, so they have no problem remembering their PRs. I like to try out new events/courses, and occasionally mix in a familiar event from a previous year - which further complicates the mental organization of stats.

Fortunately, most of these events have the finishers' information available via their websites, so with a bit of searching, I can eventually recall my stats from the past. 

But this brings up the question: Wouldn't it be great if there was a web interface to search all of those web interfaces simultaneously? 


Swiss Army Node

If you haven't already noticed from my previous blog posts, I love Node.js (and/or io.js -  hopefully they'll become the same thing again). Node.js is great at handling lots of input/output requests asynchronously, efficiently, without needing lots of code - especially if you use Promises to manage the application flow. 


Working from the back to the front

I prefer to start applications "from the back" - making sure that it's feasible to gather the necessary data, finding out what the limits are, and building an API that the front-end can use. 

I started with a list of popular running events in the area, and discovered that three of them used the mtec service to host the results for the past few years, which makes it super easy to get things started: 


Using Chrome Dev tools, I looked at the request being sent via their search form, and the markup that's returned (yeah, markup) - which can be a bit dangerous if it's not escaped correctly. For example, if a person has an apostrophe in their last name, this returned from their server:
<tr ...>  <td href="#">Firstname O'Lastname</td>  ... </tr>

Ideally, the apostrophe would be &#39; (but not mandatory). But this makes me wonder what would happen if I signed up for a race and entered my name as  <img src="..."/> (which reminds me of Bobby Tables).


Putting the pieces together

In the Node app, here's how I chose to implement the searching:
  • request and bluebird: From the back-end, I used the request package to create the HTTP/client connection to the race-results provider. Instead of using a callback function, I prefer to use Promises, so I wrapped the library using bluebird.promisify
  • cheerio: The race-results provider returns markup, but I'd prefer to use JSON for passing data. The cheerio package makes it super simple to use jQuery style selectors for parsing the text from the markup. 
  • bluebird again: In order to query lots of races simultaneously, I make a bunch of HTTP search/requests (which are now promises), and then use bluebird.all to wait until all of the searches have completed. Ideally, there should be a timeout promise in here so that if any of the individual search requests stalls, it won't delay the other searches.

Back to the Front

I've enjoyed using Angular UI Bootstrap on previous projects, so I wanted to branch out and try using Angular Material library. They share a lot of common concepts, such as the Bootstrap Grid versus the Material Design Layout Grid. It's nice to have resources that get a web interface up and working quickly and easily.

The UI is extremely simple, consisting of a single view that contains a few input fields, which are forwarded onto the back-end race-results providers.

To the Cloud

Given the straightforward/simple implementation of this app, it was easy to deploy into a Heroku Dyno. The app spends most of its time sleeping, so the initial request is always very slow (takes about 5 seconds for the Dyno to awaken).
Here's the deployed/running app: http://runcreeper.herokuapp.com

Show me the Code!

The code is available on GitHub at:  https://github.com/panurgy/run-creeper