I'm a huge fitness-data geek, and love all of the stats I can get from apps like MapMyFitness. When I finish a workout, I manually type in the info/stats from that workout over in my daily journal (currently, Evernote), which is time-consuming, and usually error-prone.
Seems like something that a computer could easily perform - and now that's entirely possible!
 Using Zapier.com, it's pretty easy to connect up things so that your workout data from MapMyFitness can be fed into Everenote, Google Sheets, or hundreds of other possibilities.
Here's an example that connects things with Google Sheets, which makes it easy to see your workouts in a spreadsheet view.
If you don't already have an account over at Zapier, you can set one up (for free!). Once you're in, you can set up a Zap, which connects data from one source (like MapMyFitness) to a destination (like Google Sheets - which assumes you already have a Google/Gmail account. If not, it's probably time to give up the AOL.com e-mail address you're using).
Let's set up a Google Sheet (spreadsheet) which will receive the workout data from MapMyFitness.
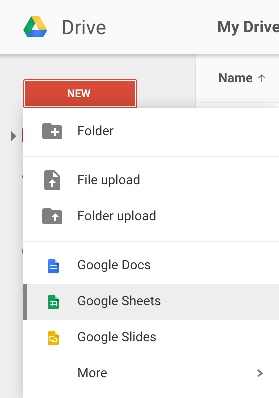
Go to drive.google.com and create a brand new Google Sheet:
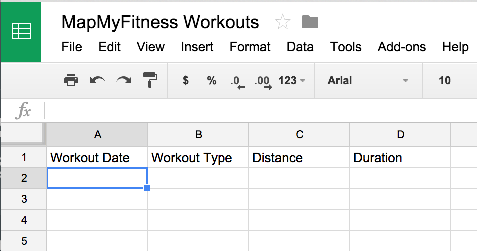
In that sheet, setup some column headings, which indicate the fields/data that you will eventually connect up:
At the Zapier web site, go ahead and create a new Zap!
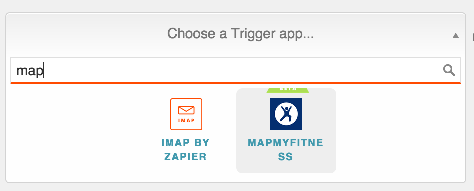
For the Trigger (data source), select MapMyFitness:
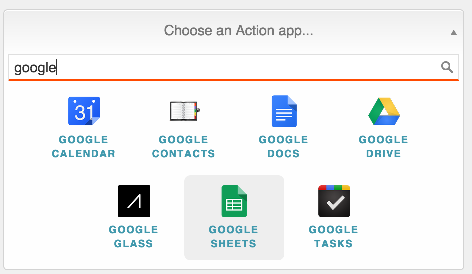
For the Action (data destination), select Google Sheets (again - this assumes that you have a Google/Gmail account, and have setup a spreadsheet like the one described earlier in this article):
Step #1 of your Zap should look something like this:
Zap Step #2: Connect your MapMyFitness account:
It will redirect you to the web site for MapMyFitness, where you have to grant access for Zapier to read your Workout data. This does not store any passwords - instead, MapMyFitness returns an "access token" that is used to access your workout information.
Zap Step #3: Connect your Google Sheets account. Same thing as the previous step - we don't store any passwords, just an "access token" provided on your behalf.
Zap Step #4: Filtering.
If you'd like to filter out things (like certain types of workouts), you can select the criteria here. Otherwise, just ignore this and continue to the next step.
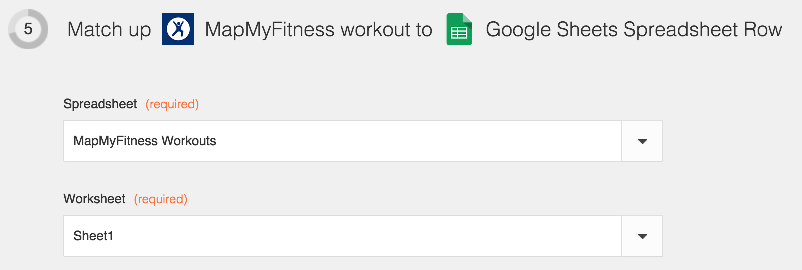
Zap Setup #5: Mapping fields
This is the most important step - this is where you select your Google Spreadsheet, and Worksheet within that spreadsheet (since a spreadsheet may contain many worksheets)
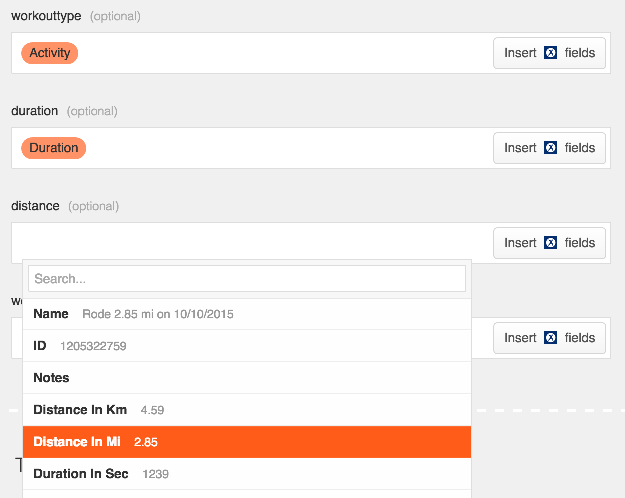
Then, you'll need to select the incoming fields from MapMyFitness, and deposit the data into the correct columns. For each field, use the button "Insert Fields", and select the correct entry. Like this:
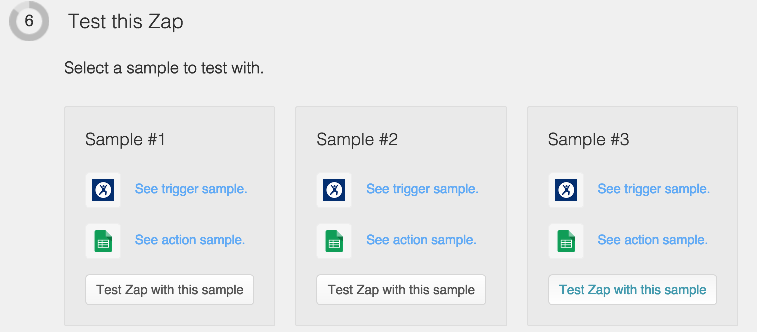
Step #6: Test it out! Go ahead and "Test Zap with this Sample". This will confirm that Zapier is able to receive Workout data from MapMyFitness. If you already have workout data present, you'll see the three most recent workout entries appear like this:
Step #7: Name the Zap, use something that will help you remember what it's doing, like "Track my workouts"
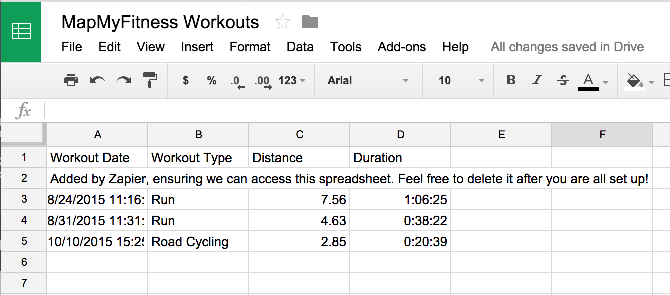
Go ahead and turn on the Zap, and then go for a walk/run/ride/swim or whatever you do with MapMyFitness. As you complete new workouts, they will accumulate within that spread sheet. Like this:
From there, the possibilities are endless - such as functions to display your total mileage for this year!
.



No comments:
Post a Comment